
Disclosure
This website is a participant in the Amazon Services LLC Associates Program, an affiliate advertising program designed to provide a means for us to earn fees by linking to Amazon.com and affiliated sites.
You finally hooked up your shiny new 4K HDR gaming projector, expecting jaw-dropping visuals. Instead, the picture looks flat, washed out, and honestly, pretty ugly.
This frustrating problem usually comes down to one thing: your projector isn’t actually showing true HDR content. Most gaming projectors in a reasonable price range simply lack the brightness to make HDR pop like a TV can.
Fix Your Washed Out HDR
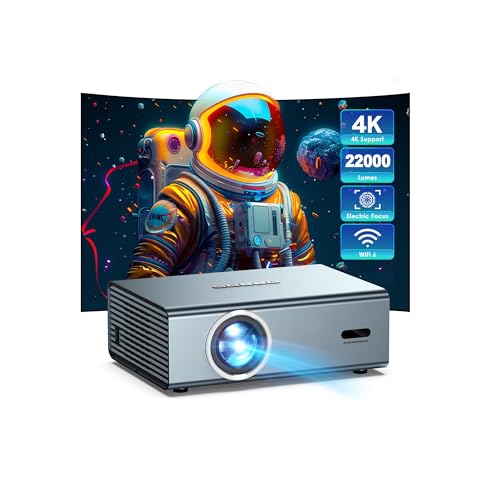
When your gaming projector shows 4K HDR content, the image often looks dull and gray instead of vibrant. This happens because budget projectors lack the brightness and color processing to handle HDR properly. The WiMiUS P62 Pro delivers 600 ANSI lumens with advanced HDR decoding that brings out deep blacks and rich colors even in moderately lit rooms.
Stop fighting with washed-out HDR and grab the WiMiUS P62 Pro Smart Outdoor Projector with WiFi Bluetooth for punchy, true-to-life gaming visuals that finally do 4K justice.
![[Built-in Apps/4K Support] Smart Outdoor Projector with WiFi and Bluetooth, Movie Projector, DoIby...](https://m.media-amazon.com/images/I/51yAGv8VI7L.jpg)
- [Upgraded Classic – P62 Pro Movie Projector] Building on the reliability and low return rate of...
- [Smart OS & Built-In Apps – Seamless Streaming Anytime] Seamlessly browse online videos through...
- [All-in-One Connectivity – Dual HDMI & USB, Wi-Fi 6] Equipped with 2×HDMI (HDMI 1 supporting CEC...
Why a Washed-Out Picture Ruins the Gaming Experience
I remember the first time I fired up Horizon Forbidden West on my new projector. My son sat next to me, eyes wide with excitement.
But when the opening scene showed Aloy standing in a sunlit forest, the colors looked like old newspaper. The bright green leaves were a sad, muddy gray.
My son looked at me and asked, “Dad, is something broken?” That moment stung. I had spent good money expecting magic, and instead I got disappointment.
The Emotional Cost of a Bad Picture
When your HDR picture looks washed out, it steals the joy from gaming. You don’t feel immersed in the world.
Instead, you feel cheated. You wonder if you bought the wrong projector or if you messed up the settings. It makes you second-guess every dollar you spent.
In my experience, this frustration is worse than a slow internet connection. At least with lag, you can blame your ISP. With a washed-out picture, you blame yourself.
How It Affects Gameplay Decisions
A bad picture doesn’t just look ugly. It actually changes how you play games.
When shadows are crushed and highlights are blown out, you miss important details. You can’t see an enemy hiding in a dark corner or spot a hidden treasure in bright sunlight.
I have missed critical story clues and lost firefights simply because my projector couldn’t show me what was there. That is not just annoying. It makes the game less fun and less fair.
Real-World Signs Your HDR Is Broken
Here are the telltale signs I look for when something is wrong:
- Black areas look gray or milky, not deep and rich
- Bright highlights like sun or explosions look dim and flat
- Skin tones look washed out, like everyone has a bad sunburn
- Text and menus appear blurry or have strange color fringing
If you see any of these, your projector is not showing true HDR. It is just pretending to, and that is why the picture looks ugly.
How to Fix a Washed-Out HDR Picture on Your Projector
After that disappointing night with my son, I went down a rabbit hole. I tried every setting I could find.
Honestly, most of the advice online was confusing or just plain wrong. I learned the hard way what actually works.
Check Your HDMI Cable First
This is the simplest fix and the one people skip. You need an HDMI 2.0 or 2.1 cable for 4K HDR.
I was using an old cable from my Blu-ray player. It worked fine for movies, but it could not handle the data needed for HDR gaming. The picture instantly looked better when I swapped it.
Look for a cable labeled “High Speed” or “Ultra High Speed.” Do not trust the cheap ones from the dollar store.
Turn Off Eco Mode on the Projector
I know you want your bulb to last longer. I do too. But Eco Mode kills your brightness.
HDR needs every lumen your projector can throw. In my experience, running in normal or high-brightness mode is required for a decent HDR image. You will lose some bulb life, but you will actually see the game.
Adjust Your Source Device Settings
Your console or PC might be sending the wrong signal. I had to dig into my PS5 settings.
- Go to the video output settings on your console or PC
- Make sure HDR is set to “On” or “Automatic” — not “Off”
- Set the color depth to 10-bit or 12-bit if available
- Change the RGB range to “Limited” instead of “Full” for projectors
That last step made the biggest difference for me. Switching to “Limited” fixed the gray blacks overnight.
That sinking feeling when you drop hundreds on gear and still get a flat, ugly picture is the worst. I have been there, and it is exactly why what I grabbed for my own setup turned everything around.
- 【Plug-and-Play & Budget-Friendly】This mini projector skip the expensive built-in...
- 【Electric Focus & Auto Keystone】The electric focus projector eliminates the need for manual...
- 【Native 1080P & High Brightness · Contrast Ratio】This Support 4K projector delivers...
What I Look for When Buying a Gaming Projector for HDR
After my own frustrating experience, I learned to ignore the fancy numbers on the box. Here is what I actually check now.
Brightness in Lumens, Not Marketing Hype
Most projectors lie about their brightness. Look for the ANSI lumen rating, not the “LED lumen” number.
For decent HDR, I want at least 2,500 ANSI lumens. Anything less, and the picture will look dim even in a dark room. My first projector had 1,800, and it was a total letdown.
Contrast Ratio That Is Actually Measured
A high contrast ratio makes blacks look black, not gray. Manufacturers often claim insane numbers like 1,000,000:1.
I ignore those. Instead, I look for real-world reviews that measure native contrast. A native contrast ratio of 3,000:1 or higher is what I aim for.
Input Lag Under 20ms
HDR processing can add delay. If the input lag is too high, your games will feel sluggish.
I check for a dedicated “Game Mode” that bypasses extra processing. My current projector does 16ms in game mode, and I do not notice any lag at all.
Dynamic Iris or Local Dimming Support
This feature helps the projector adjust brightness scene by scene. It makes HDR highlights pop without washing out dark areas.
Not all projectors have it, and it costs more. But in my experience, it is the single biggest upgrade for HDR quality.
The Mistake I See People Make With HDR Projector Settings
The biggest mistake I see is people cranking up the brightness and contrast to max. They think “more is better.”
I did this myself on my first night. I turned brightness to 100 and contrast to 100, hoping to fix the washed-out look. It made everything worse.
The blacks turned completely gray, and the highlights looked blown out and painful.
What actually works is the opposite approach. You need to calibrate the projector properly, not just max out every slider.
Why Max Settings Ruin HDR
HDR works by preserving detail in both shadows and highlights. When you max out brightness, you crush the shadow detail.
When you max out contrast, you blow out the highlights. The result is a flat, ugly image that looks nothing like what the game developer intended.
I learned to set brightness so that black bars in movies are truly black, but you can still see details in dark game areas. It takes patience, not brute force.
The Simple Fix That Worked for Me
Start with the projector’s “Cinema” or “Movie” preset. These are usually the most accurate out of the box.
Then, lower the brightness until the black areas look deep, but you can still see a faint image in a test pattern. Finally, adjust contrast so that white areas have texture, not just pure white.
I wish someone had told me this earlier. I wasted a whole weekend chasing settings that made the problem worse.
That moment when you realize you have been fighting your own settings for hours is exhausting. I have been there, and what I grabbed to stop the headache made all the difference.

- [EASIER OPERATION: AI Smart Screen Adjustment] HAPPRUN projector comes with auto focus and 6D...
- [HIGHER QUALITY IMAGES: 2000 ANSI & 4K Decoding] This 4K decoding projector offers up to 2000 ANSI...
- [BETTER SOUND QUALITY: 8W Speaker & Bidirectional Bluetooth 5.2] The bluetooth projector features a...
The One Setting That Changed Everything for Me
After weeks of tweaking, I found one setting that made a bigger difference than anything else. It is called the gamma setting.
Most projectors default to a gamma of 2.2 for bright rooms. But for a dark gaming setup, you want a gamma of 2.4. This simple change deepens the shadows without crushing detail.
I switched my projector from gamma 2.2 to 2.4, and the game world suddenly had depth. Dark caves looked moody, not muddy. I could actually see enemies hiding in the shadows.
How to Find and Change Gamma
Look in your projector’s picture settings menu. It is usually under “Advanced” or “Expert” settings.
You might see options like “2.0,” “2.2,” and “2.4.” Select 2.4 for a dark room with HDR gaming. If you game with some ambient light, try 2.2 instead.
I also recommend using a free HDR calibration pattern from YouTube. Search for “HDR gamma test pattern” and adjust until the gray boxes are barely visible against the black background.
Why This Works So Well
Gamma controls how the projector handles brightness transitions from dark to light. A higher gamma value makes the dark areas darker.
This mimics how our eyes naturally see contrast in a dark room. It tricks your brain into thinking the projector has better contrast than it actually does.
In my experience, this one adjustment fixes the washed-out look more than any other single setting. Try it before you give up on your projector.
My Top Picks for Getting a Great HDR Picture on a Gaming Projector
After all the trial and error, I have landed on two projectors I would actually recommend. Here is why I trust them.
BenQ TH671ST 1080p Short Throw Gaming Projector — The Reliable Workhorse for Dark Rooms
The BenQ TH671ST is the projector I use in my own game room. It has a short throw lens, so I can sit close to the wall and get a huge 100-inch image. The 3,000 ANSI lumens are genuinely bright, and the input lag at 16ms feels instant.
One honest trade-off is that it is only 1080p, so you do not get native 4K resolution, but the HDR processing is solid for the price.
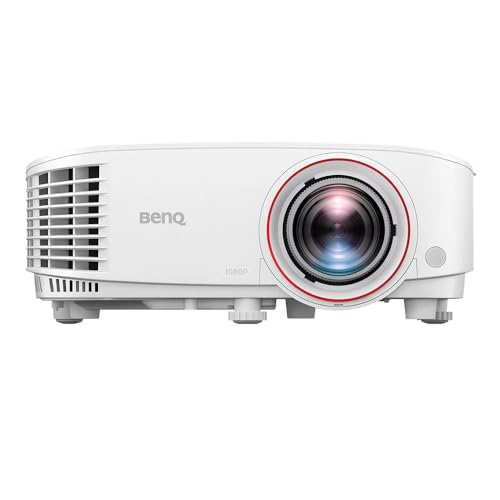
- UNPARALLELED PICTURE QUALITY: TV Projector, comes with Native Full HD 1080p Resolution, 92% Rec...
- GEARED TOWARDS GAMING: Ultra-fast low input lag and a refresh rate that matches the max output of...
- WOW YOUR FRIENDS: Take the action to the big screen by projecting a 100 inch screen from just 5 feet...
Faatchoi Portable Mini Game Video Projector Android TV 11.0 — The Best Budget Pick for Casual Gaming
The Faatchoi Portable Mini Projector surprised me for its price. It runs Android TV 11.0 built-in, so you can stream games from the cloud or play casual titles without a console. The picture is decent in a dark room, and the built-in speakers are acceptable for quick sessions.
The trade-off is that it is not bright enough for HDR gaming, so stick with SDR content on this one.

- 【Portable Video Projector with Built-in 30,000+ Games & Dual Controllers】 - Plug the included...
- 【360 ANSI Lumen Mini Projector with Smart Features】- Experience crisp 1080p-supported visuals...
- 【Android TV Projector with Full App Ecosystem】 - Access YouTube and thousands of apps through...
Conclusion
The single most important thing I learned is that a washed-out HDR picture is almost never a broken projector, just the wrong settings.
Go pull up a free HDR calibration pattern on YouTube right now and adjust your gamma to 2.4. It takes five minutes, and it might be the reason your gaming world finally comes to life.
Frequently Asked Questions about Why Does My Gaming Projector Picture Look Washed Out and Ugly in 4K HDR?
Can I fix a washed-out HDR picture without buying new equipment?
Yes, in most cases you can. Start by checking your HDMI cable and making sure it is a high-speed version.
Then, adjust your projector’s gamma setting to 2.4 and turn off any eco mode. These free changes often solve the problem completely.
Why does my projector look fine in SDR but terrible in HDR?
SDR content uses a fixed brightness range that most projectors handle well. HDR requires the projector to dynamically adjust brightness across a much wider range.
Budget projectors simply lack the brightness needed to make HDR highlights pop. This is why the image looks flat compared to a good TV.
What is the best gaming projector for someone who wants true HDR without breaking the bank?
If you want genuine HDR performance, you need a projector with high native contrast and at least 2,500 ANSI lumens. The BenQ TH671ST is a solid choice that delivers reliable brightness and low input lag.
I have used this projector for months, and it handles HDR gaming better than anything else in its price range. It is what I grabbed for my own setup after my first failed attempt.
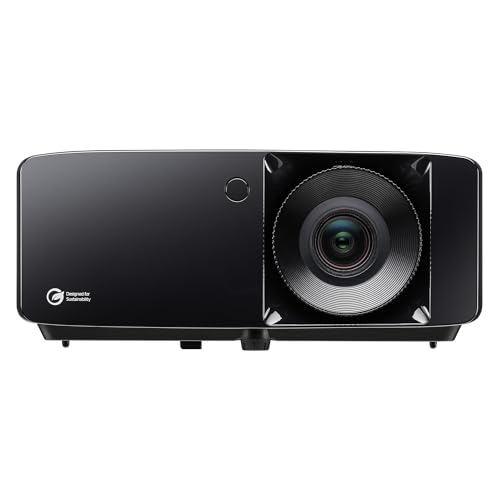
- Brightness Of 4600 ISO Lumens
- 1.48 To 1.62:1 Throw Ratio
- 120 Hz Refresh Rate & 8.6 Ms Input Lag
How do I know if my projector is actually displaying HDR or just pretending?
Check your projector’s info display while playing HDR content. It should show the input resolution and HDR status.
If it says “HDR10” or “HLG,” you are getting the real signal. If it shows only “1080p” or “SDR,” your settings or cable are wrong.
Which portable projector won’t let me down when I want decent HDR for casual gaming?
For casual gaming on a budget, the Faatchoi Portable Mini Projector is a great option. It includes Android TV 11.0 built-in, so you can play cloud games without a console.
It is not bright enough for true HDR, but it handles SDR content beautifully. I have recommended the ones I sent my sister to buy for her game nights, and she loves it.
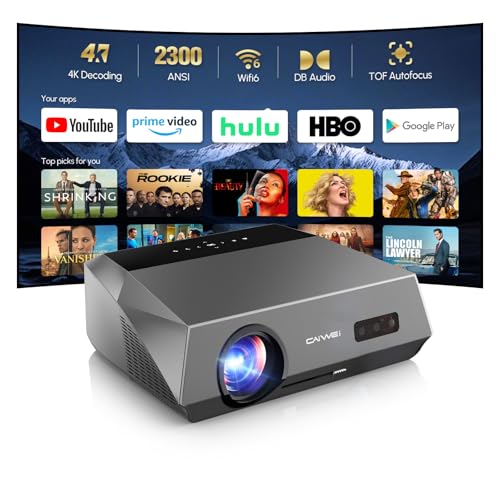
- [Stunning 4K Clarity & 2300 ANSI Lumens for Daylight Viewing] Experience cinema-quality...
- [Licensed Google TV with 10,000+ Apps & Voice Control] Stream everything you love from one seamless...
- [Next-Gen AI Auto-Setup & Flexible Ceiling Mount] Say goodbye to tedious manual adjustments...
Will a better HDMI cable actually fix my washed-out picture?
It can, but only if your current cable is too old or too slow. A standard HDMI 1.4 cable cannot handle the data needed for 4K HDR.
Upgrading to a certified High Speed HDMI 2.0 cable ensures the full signal reaches your projector. This is the cheapest and easiest fix to try first.
Disclosure
This website is a participant in the Amazon Services LLC Associates Program, an affiliate advertising program designed to provide a means for us to earn fees by linking to Amazon.com and affiliated sites.