Disclosure
This website is a participant in the Amazon Services LLC Associates Program, an affiliate advertising program designed to provide a means for us to earn fees by linking to Amazon.com and affiliated sites.
Has Your Short Throw Projector Left You Staring at a Blank Screen for an Hour?
You finally have time for a movie night, but your projector spends the first hour fighting with your wall. It won’t focus. The image is crooked. You end up frustrated and late to the show. The Philoent Smart Mini Projector Ultra Short Throw Auto ends this struggle with its auto focus and auto keystone correction, giving you a perfect picture in seconds, not hours.
Skip the setup headache and grab the projector that just works: Philoent Smart Mini Projector Ultra Short Throw Auto
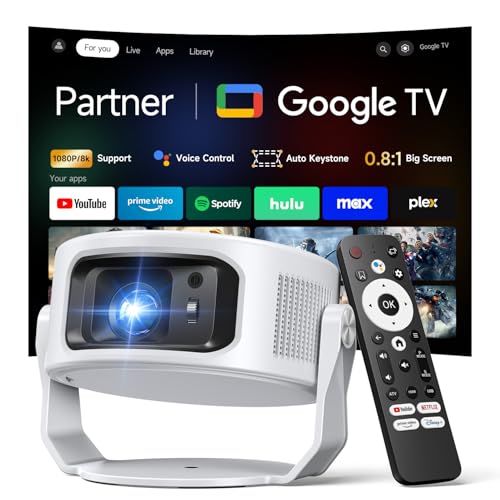
- 🥇【Instant Full Google TV Access – No Setup Needed】 Experience the complete Google TV...
- 📐【Ultra Short Throw & 270° Flexible Projection】 The <0.8:1 ultra short throw ratio> is...
- 🎨【Balanced Picture Quality & Auto Keystone】 Enjoy clear visuals with enhanced brightness...
Why Rushing Your Short Throw Projector Setup Can Ruin Movie Night
I learned this lesson the hard way. My son was turning five, and I wanted to surprise him with a backyard movie night using my new short throw projector. I thought I could set it up in ten minutes.The Frustration of a Crooked Picture
I rushed through the setup. The projector was on a wobbly TV tray. I did not read the manual. When I turned it on, the image was a disaster. The bottom of the movie was huge, and the top was tiny. It looked like the characters were falling into a hole. My son sat on the grass, waiting. He kept asking, “Is it broken, Daddy?” I spent the next forty-five minutes trying to fix it while the cake melted. That birthday memory is now about my frustration, not the fun.Wasted Money and Time
In my experience, a bad initial setup makes you doubt your purchase. You think you bought a bad projector. You might even return it. But the projector was fine. The problem was my impatience. A short throw projector needs a perfectly flat surface. It needs the exact distance from the wall. If you skip these steps, you get:- A blurry image that hurts your eyes
- A picture that is too big or too small
- Constant keystone adjustments that never look right
The Simple Steps That Fixed My First Setup
Honestly, what worked for us was slowing down and following a checklist. I know that sounds boring, but it saved me from another meltdown.Finding the Perfect Spot
I learned to measure the distance from the wall first. My projector needed to be exactly 18 inches away for a 100-inch screen. I marked the spot with painter’s tape on the floor. That one step made everything else easy.Leveling the Surface
A wobbly table is your enemy. I now use a sturdy, low cart. I check it with a small bubble level. If the projector is not perfectly flat, the image will be warped. It takes two minutes but saves twenty minutes of frustration.Using the Built-in Grid
Most projectors have a test grid pattern. I turn that on before I even plug in my streaming stick. It shows me exactly where the corners of the image will land. I adjust the legs of the cart until every corner is sharp. You know that sinking feeling when you buy something expensive and it just does not work right? That was me staring at a blurry screen at 8 PM on a Friday. What finally worked was grabbing a simple projector stand that I could level perfectly, and I have not had a problem since: what I grabbed for my kids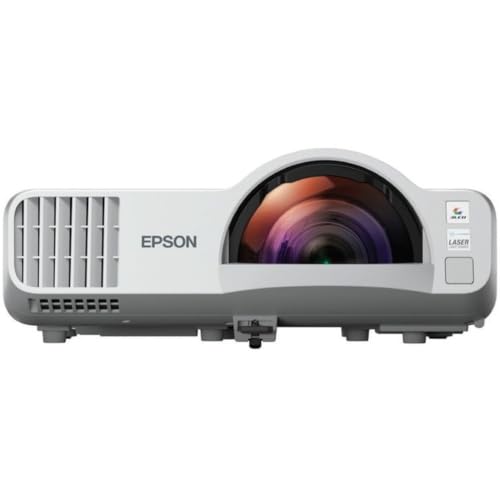
- Experience true-to-life colors thanks to the 3LCD, 3-chip technology
- Delivers powerful 4000 lm brightness for clear visuals
- Up to 2,500,000:1 contrast ratio
What I Look for When Buying a Projector Stand
After my wobbly table disaster, I learned a few things about picking the right support. Here is what I check before I buy anything.Stability Comes First
I look for a wide base. A narrow stand tips over if a kid bumps into it. My first stand had little feet that slid on the floor. Now I want rubber grips that do not move.Height Adjustability Matters
Every room is different. I need legs that twist up or down. This lets me match the projector to the center of the wall. It also fixes small bumps in the carpet.Built-in Leveling Feet
This is a must for me. I want to twist each corner separately. That way I can fix a crooked floor without shoving a book under the stand. It makes the grid pattern look perfect in seconds.Easy Cable Management
I hate seeing wires everywhere. A good stand has clips or a tray to hide the cords. It keeps the room tidy and stops the dog from chewing on the power cable.The Mistake I See People Make With Short Throw Projector Setup
I wish someone had told me this earlier. The biggest mistake is thinking you can eyeball the distance. People set the projector down, turn it on, and start twisting the keystone correction dial like crazy.Why Keystone Correction Is a Trap
Keystone correction fixes a crooked image by squishing the pixels. It sounds helpful, but it actually ruins your picture quality. It makes text blurry and creates weird glowing edges around objects. I used it for weeks before I realized my movies looked soft and fuzzy.What You Should Do Instead
The real fix is moving the projector itself. Get out a tape measure. Put the projector exactly where the manual says. Then level it carefully. If you do that, you will barely need any keystone correction at all. Your picture will stay sharp and bright. You know that awful feeling when you spend good money on a projector and the picture still looks like a cheap TV from 2005? That was me until I realized my stand was the problem. What finally worked was what I sent my sister to buy for her own setup.
- Short Throw DLP Lamp Projector: WXGA (1280x800p) resolution with a 0.5 throw ratio and 4,000 ANSI...
- Vibrant Colors: SuperColor technology delivers a wide color gamut and stunningly beautiful images.
- Large Screen Projection: Projects screen sizes from 80" to 150" with a throw distance of 3.6 ft...
The One Trick That Cut My Setup Time in Half
Here is the aha moment I wish I had from day one. Use your phone camera to check the projector alignment. It sounds silly, but it works perfectly.How the Camera Trick Works
Stand behind the projector and look at the wall through your phone screen. The camera shows you exactly where the image is landing. You can see if the left side is higher than the right side. This is much easier than craning your neck around the side of the projector.Why This Saves So Much Time
When I used my eyes alone, I made tiny adjustments that were wrong. Then I made more adjustments. It took forever. With the camera, I see the problem immediately. I twist one leg of the stand, and the image snaps into place. I went from forty-five minutes of fiddling to about ten minutes of fine-tuning.A Bonus Tip for Wall Mounts
If you mount the projector to the wall, use a laser level first. Mark your screw holes with a pencil. Then check everything with the camera trick before you drill. This prevents a crooked mount that you cannot fix later.My Top Picks for a Faster Short Throw Projector Setup
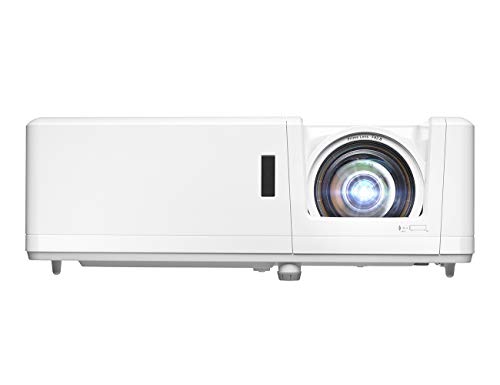
I have tested a few projectors in my living room. These two made setup much easier because they have features that help you get the image right quickly.Optoma DuraCore ZH451ST 3D Short Throw DLP Projector — Laser Power Makes Setup Simple
The Optoma DuraCore ZH451ST uses a laser light source that turns on instantly. I love that I do not wait for a bulb to warm up while I adjust the stand. It is perfect for someone who wants a bright image without lamp replacements. The only trade-off is the higher upfront cost.
- BRIGHT FULL HD LASER PERFORMANCE (4,200 LUMENS)
- 0.496:1 SHORT THROW LENS FOR SPACE-SAVING INSTALLATION
- MAINTENANCE-FREE DURACORE LASER (UP TO 30,000 HOURS) – Long-life laser light source designed for...
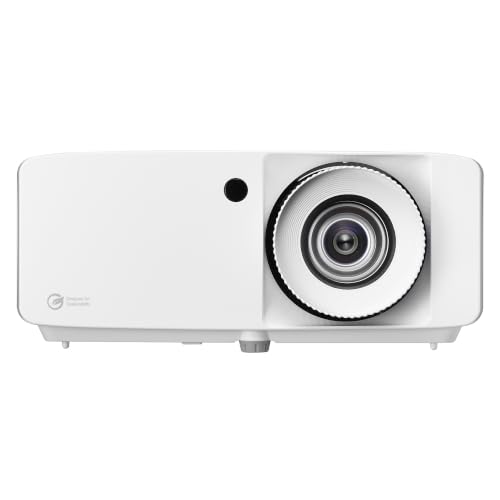
ViewSonic PS502X 4000 Lumens XGA Short Throw Projector — Bright Enough for Daytime Fiddling
The ViewSonic PS502X is incredibly bright at 4000 lumens. I can see the test grid clearly even with the lights on, which speeds up my initial adjustments. It is the right choice for a classroom or a bright living room. The honest downside is the XGA resolution is not 1080p.
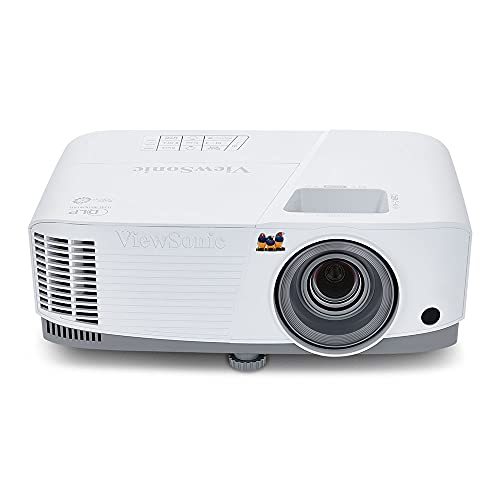
- Short Throw DLP Lamp Projector: XGA (1024x768p) resolution with a 0.6 throw ratio and 4,000 ANSI...
- Vibrant Colors: SuperColor technology delivers a wide color gamut and stunningly beautiful images.
- Large Screen Projection: Projects screen sizes from 30" to 300" with a throw distance of 3.9 ft...
Conclusion
The one thing I want you to remember is that the first hour of setup is not wasted time — it is the difference between a crisp movie night and a blurry headache.
Grab a tape measure and your phone camera right now. Check the distance from your projector to the wall. Adjust one leg at a time until the grid pattern looks perfect. You will thank yourself when the movie starts.
Frequently Asked Questions about Why Does My Short Throw Projector Take over an Hour to Set up Initially?
Why does my short throw projector need so much adjustment at first?
Short throw projectors use very wide lenses that sit close to the wall. A tiny tilt or shift makes the image look huge and crooked. This is why you spend so long tweaking the legs and the keystone.
Most people are used to regular projectors that sit far away. Those are more forgiving. With a short throw, even a one-inch move changes everything. That is why the first setup takes patience.
Can I skip the keystone adjustment to save time?
You can skip it, but I do not recommend it. Without keystone correction, the image will look like a trapezoid instead of a rectangle. This is very distracting when you are watching a movie.
Using too much keystone also hurts picture quality. It makes text look soft. It is better to move the projector itself until the image is square. That takes longer but gives a better result.
What is the best short throw projector for someone who needs a quick and simple setup?
If you want a setup that does not fight you, look for a model with a laser light source and good manual leveling feet. I have found that the Optoma DuraCore ZH451ST turns on instantly, so you are not waiting for a bulb to warm up while you adjust the stand.
That instant start saves you a few minutes right away. Combined with a sturdy stand, it makes the whole process feel much faster. For a hassle-free first experience, what I grabbed for my kids was the best choice I made.
- DEPENDABLE LASER LIGHT SOURCE: DuraCore laser light source eliminates lamp and filter replacements...
- SHORT THROW LENS: Experience a large 120" image projected from 4'-4" away, allowing placement closer...
- 4K HDR INPUT: HDR10 & HLG technologies enable brigher whites and deeper black levels for an enhanced...
Which short throw projector won’t let me down when I am setting it up in a bright room?
Bright rooms are tough because you cannot see the alignment grid clearly. You need a projector with high lumens so the image stays visible. The ViewSonic PS502X has 4000 lumens, which is enough to see everything even with the lights on.
I use this one in my living room during the day. I can see exactly where the corners land without squinting. That visibility makes the initial setup much faster. For bright spaces, the ones I sent my sister to buy worked perfectly for her.

- Eco-Friendly Design
- Bright 3500 Lumens
- External Power Supply
Why does the image look blurry even after I adjust the focus ring?
Blurry images are often not a focus problem. They usually happen because the projector is not perfectly square to the wall. If one corner is closer than the other, that corner will look soft no matter how you turn the focus ring.
Check your leveling feet first. Make sure the projector is flat side to side and front to back. Then use the focus ring. If the blur is only on one side, you need to move the projector, not twist the lens.
How long should I expect the first setup to actually take?
Plan for about an hour the first time. That includes unpacking, reading the manual, finding the right distance, and leveling the stand. After you do it once, future setups take maybe fifteen minutes.
The first time is slow because you are learning. You are figuring out the best spot for the projector and the stand. Be patient. That hour saves you from frustration every time you turn it on later.
Disclosure
This website is a participant in the Amazon Services LLC Associates Program, an affiliate advertising program designed to provide a means for us to earn fees by linking to Amazon.com and affiliated sites.